
Pinterest is a social media and a visual search engine that helps you drive massive traffic to your blog.
But in order to drive organic traffic from Pinterest, you have to save engaging, attractive, and valuable pins consistently.
Most importantly you have to claim your website and apply for Rich Pin on Pinterest to get more advanced analytics and features.
In this post, I’m going to show you exactly how to claim your website and apply for Rich Pin on Pinterest to drive massive targeted traffic to your blog.
Let’s dive right in.

Table of Contents
Claim Your Website
You should claim your website to get access to your website analytics. It lets people know where they can find more of your content.
Your profile picture and your name will show up next to any pin that comes from your site.
A small globe icon with a checkmark icon appears next to your site URL on your Pinterest profile.
To claim your site, go to edit settings section and head over to Claim section and then enter your site URL and hit the Claim button.

Pinterest will display a popup with two methods that you can use to claim your website. (add HTML tag or Upload HTML file)
Choose the HTML tag option because it’s easier. Just copy the HTML tag and go to your WordPress dashboards.
If you have the Yoast SEO plugin installed on your site, then visit SEO » Social page on your WordPress dashboard.
On the Facebook tab, make sure that open graph settings are enabled.
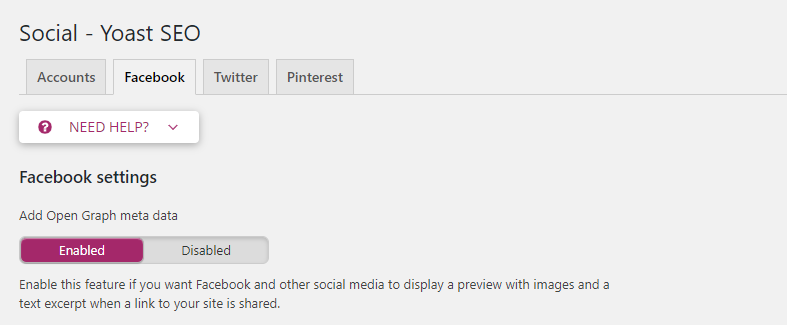
Next, go to the Pinterest tab, in the Pinterest confirmation field, past the HTML tag that you copied previously, and click on the save changes button.

If you’re not using the Yoast SEO Plugin, you can use the Insert Headers and Footers plugin to insert the HTML tag to your site’s header section.
Once the HTML tag is added in your site’s header section, go back to the Pinterest popup screen and click on the Next button and then click the Submit button.

Usually, the verification process takes 24 hours, and you’ll get an email from Pinterest about the verification of your website.
Once the verification process is done, you’ll see the confirmation on the Claim section on Pinterest.

This post contains affiliate links (I don’t recommend anything that I don’t believe in), meaning at no extra cost to you, I might receive a small commission for purchases made through these links.
Read more: The Ultimate Guide on How to Start a Money Making Blog in 2020
Apply for Rich Pins
Rich Pins provide more context about pins because they show extra information directly on a pin.
Pinterest has 4 types of Rich Pins: app, product, recipe, and article.
As I write articles on my blog, I have enabled article Rich Pin on my Pinterest account.
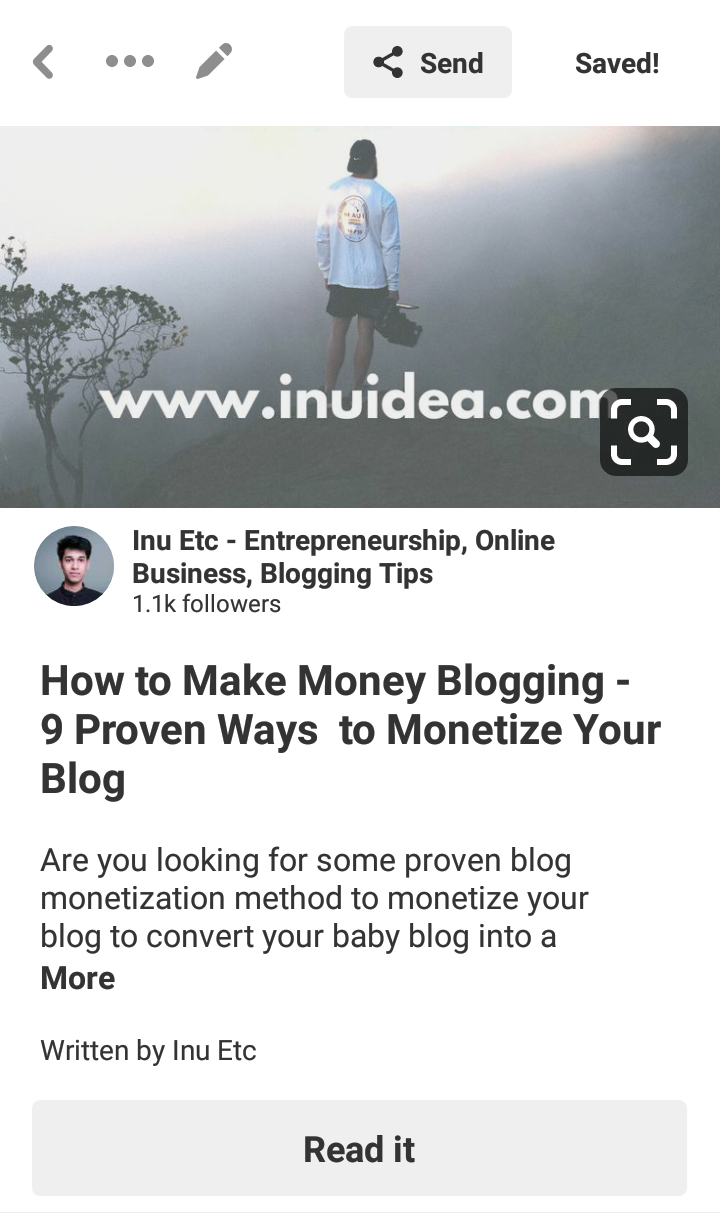
Article Pins helps users know more about the pin by showing the article headline, author name, description, ‘read it’ button, published date, and site name.
For example,
Here’s a Rich Pin from my profile:
Setting up Rich Pins for your blog is one of the most important steps if you want to look more professional on Pinterest.
Rich Pins attract more eyeballs and help you drive more traffic to your blog.
Once you have claimed your website, you can apply for Rich Pins.
Go to Pinterest Rich Pin Validator, enter one of your blog post URL, and hit validate.
Once you get the green check and ‘Your Pin’s have been validated! Apply to enable your Rich Pins’ message you can click apply.
Sometimes your blog will be approved instantly; other times, Pinterest will take some time to verify your blog.
It can take a few days for your pins to start showing up as Rich Pins. But if it’s not showing after a few days, contact the Pinterest help desk.
Join my group board – Traffic Sphere.
Final Thoughts: How to Claim Your Website and Apply for Rich Pin on Pinterest
Claiming your website and setting up Rich Pin isn’t complicated and not so technical things to do. After reading this guide you can easily claim your site and enable Rich Pin on Pinterest. But in case you need any kind of help from me, just contact me.
If you really want to grow your Pinterest account to grow your blog traffic and audience, make sure you save pin consistently, use Tailwind to schedule your pins and also follow my ultimate guide to Pinterest success – 11 Actionable Ways To Get Massive Traffic From Pinterest!
Now It’s Your Turn
Hey, I hope you enjoyed reading this guide to claiming your website and setting up Rich Pin on Pinterest.
Now I would like to hear from you:
Have you claimed your website and enabled Rich Pin on Pinterest?
Let me know in the comment section below right now!
Also, share this post with your friends and bloggers who want to claim their website and set up Rich Pin for their domain to grow their audience.
Learn How to Claim Your Website and Apply for Rich Pin on #Pinterest !!! #BloggingTips #Blogging !!! Share on XIf you have any questions, feel free to contact me. I’m always available to help young hustlers like you.
Keep hustling!
Leave A Comment